Linux
How to install Jenkins on Ubuntu 20.04 LTS
Written in Java, Jenkins is an opensource automation server. It is used by developers in automating tasks in the software development cycle. It ships with numerous and handy plugins which help in continuous integration by enabling developers to make the necessary changes to applications before going into production. In this topic, we will install Jenkins on Ubuntu 20.04 LTS, which is the latest Ubuntu version.
In summary, we shall tackle the following:
1: Install Jenkins on ubuntu
2: Starting Jenkins
3: Configuring the firewall
4: Setting up Jenkins
Without much further ado, let’s dive in.
Step 1: Install Jenkins on ubuntu
Jenkins is available from Ubuntu repositories and can be installed directly using the APT package manager. However, the version installed will not be the latest. To install the latest version on your system, and enjoy the latest features and bug fixes, we will take advantage of the project-maintained packages.
First, add Jenkins repository key to your system as shown:
|
1 |
$ wget -q -O - http://pkg.jenkins-ci.org/debian/jenkins-ci.org.key | sudo apt-key add - |

The command should return an ‘OK‘ response as shown.
With the repository key in place, add the Debian’s package repository to the sources.list file as shown
|
1 |
$ sudo sh -c 'echo deb http://pkg.jenkins-ci.org/debian-stable binary/ > /etc/apt/sources.list.d/jenkins.list' |
Now update the system so that the APT package manage can begin using the newly added repository.

Since Jenkins is Java-based, you need to install OpenJDK. We are going to install OpenJDK as shown:
|
1 |
$ sudo apt install openjdk-11-jdk-headless |
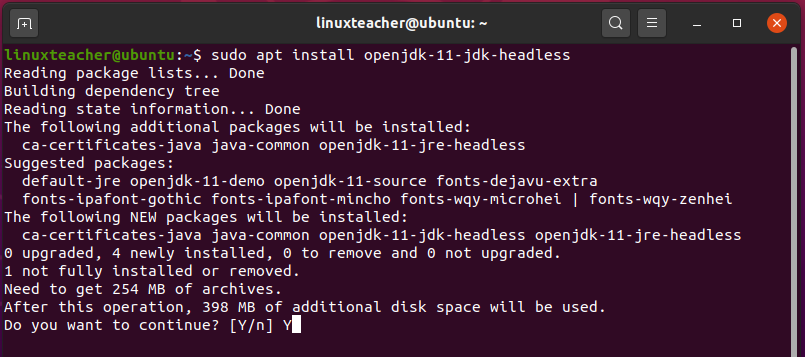
Now, to install Jenkins, simply run the command below
|
1 |
$ sudo apt install jenkins |

Step 2: Start Jenkins
By default, Jenkins is started upon installation on Ubuntu 20.04 LTS. You can confirm it’s running status by executing the command:
|
1 |
$ sudo systemctl status jenkins |
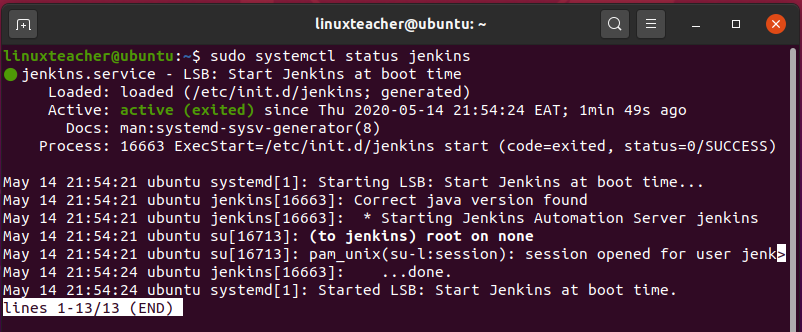
From the output, we can clearly see that Jenkins is up and running.
If by any chance Jenkins is not started, execute the command below to have it up and running:
|
1 |
$ sudo systemctl start jenkins |
To enable Jenkins upon booting, run the command:
|
1 |
$ sudo systemctl enable --now jenkins |

Jenkins will now start every time you restart or power on your system. That’s great!
Step 3: Configuring the firewall
At this point, we can only access Jenkins from the local server. We need to make a few adjustments to the firewall so that external users can access our server.
|
1 |
$ sudo ufw allow 8080/tcp |
|
1 |
$ sudo ufw reload |
To confirm that we have opened port 8080 on which Jenkins will be listening to, run the command:
|
1 |
$ sudo ufw status |

The output confirms that the port is open on the firewall. Now, let’s proceed and set up Jenkins on the browser,
Step 4: Setting up Jenkins
To setup Jenkins, fire up your web browser, and in the URL bar, type your server’s IP address followed by the port 8080.
|
1 |
http://server-IP:8080/ |
You will get the first page which is the ‘Unlock Jenkins‘ screen as shown. In order to securely set up Jenkins, you will be required to paste the Administrator’s password which is located on the path indicated below.
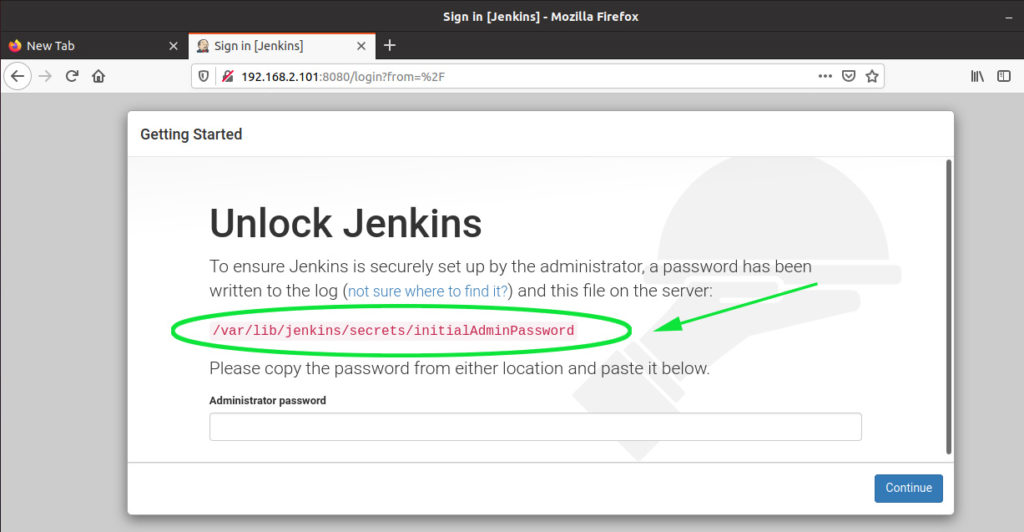
So head out to your terminal and use the cat command to reveal the password.

Copy and paste the password back to the ‘Administrator’s password‘ text field as shown. Once pasted, click on the ‘Continue‘
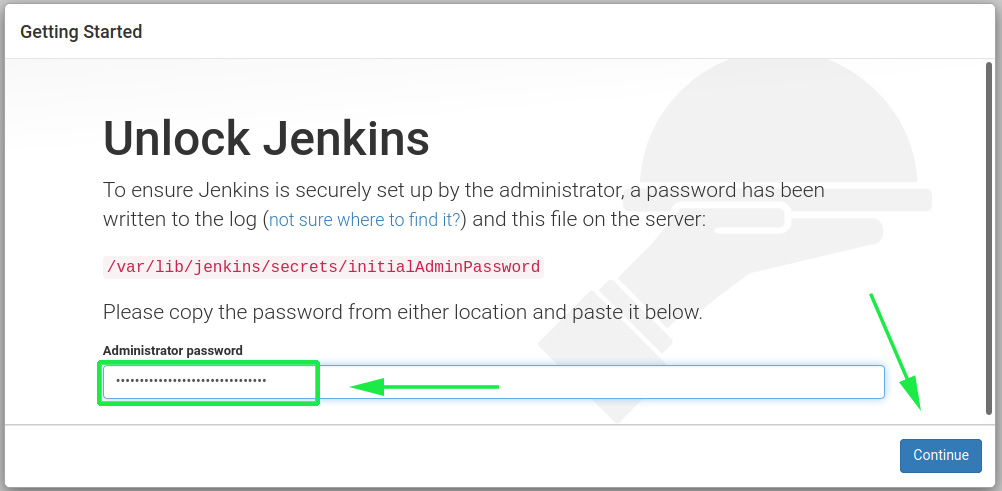
On the next page, select “Install custom packages“
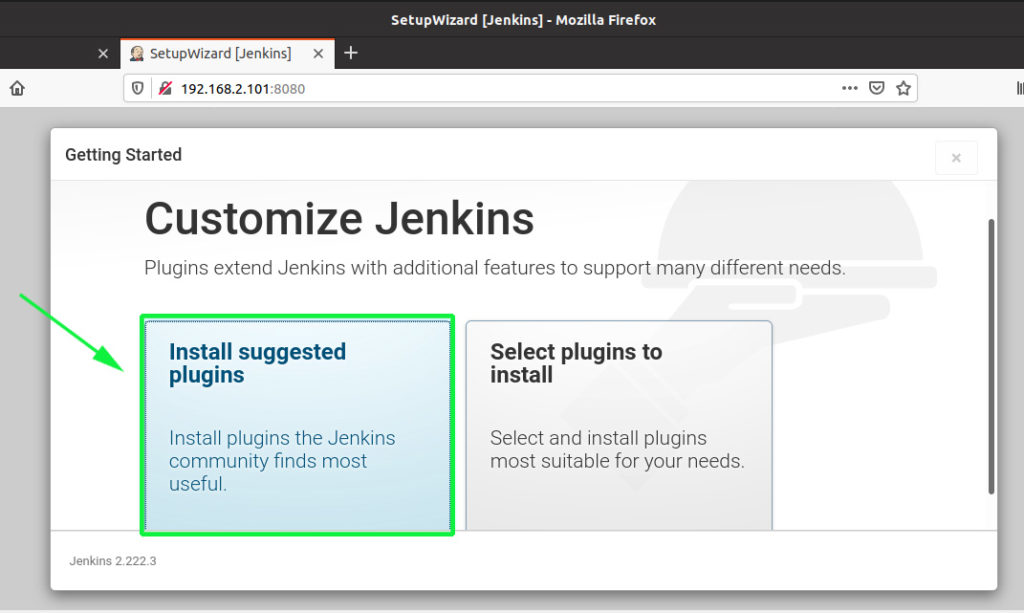
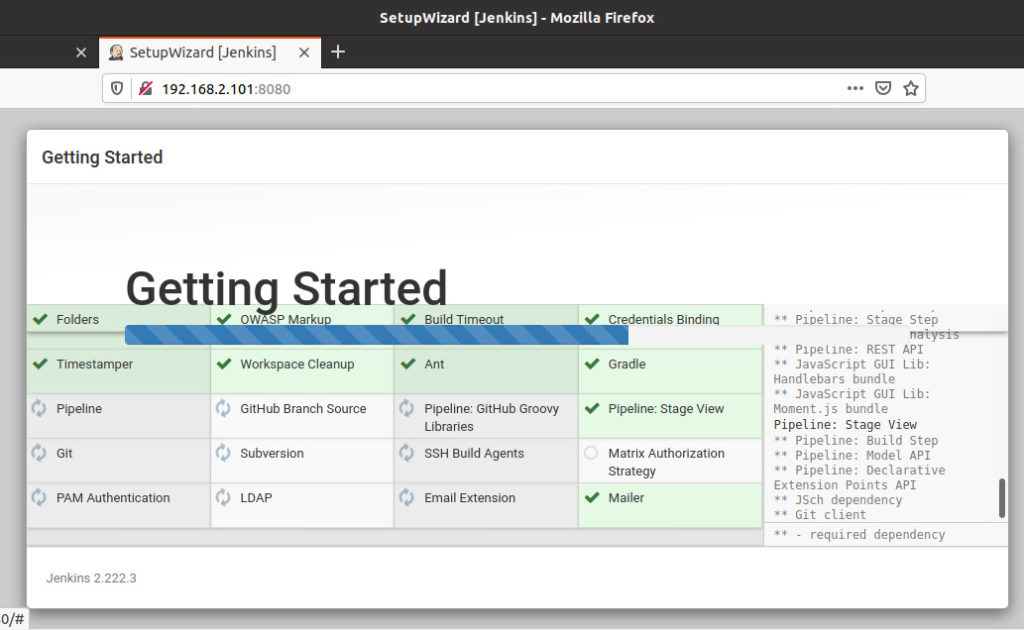
Thereafter, the installation of the plugin will commence as shown. This will take between 5- 10 minutes and you can grab some tea or coffee as Jenkins installs all the requisite plugins.
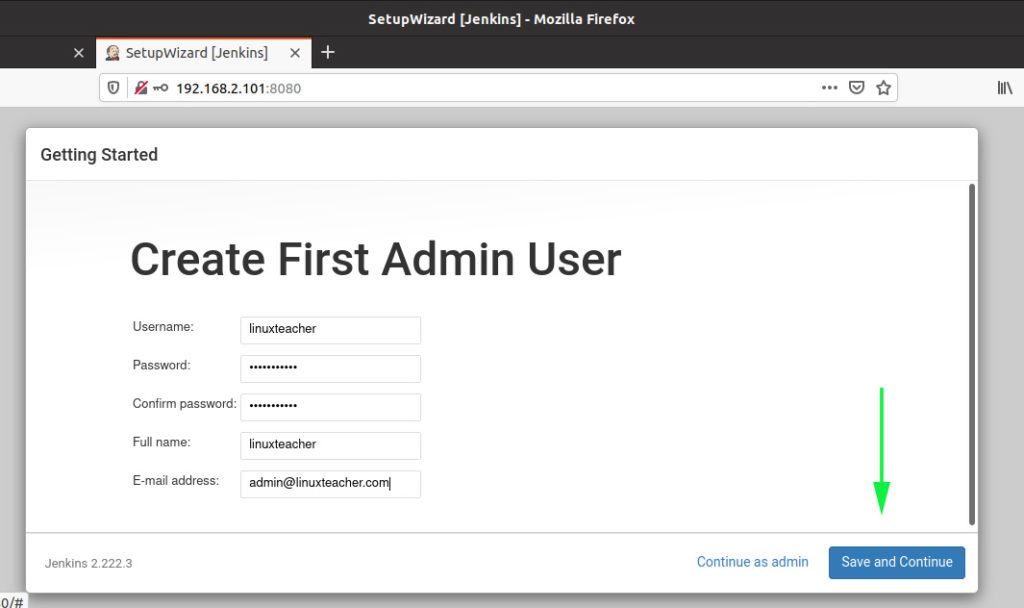
Next, you will be required to create an admin user. So fill up all the details as shown and click ‘Save and Continue‘.
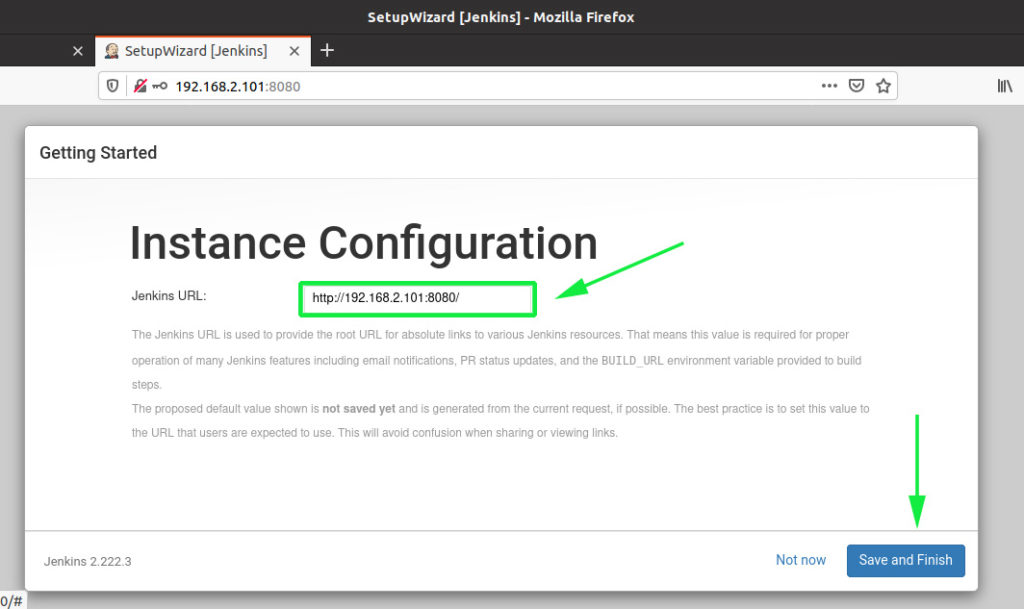
In the next step, Jenkins will display the URL that you will use to log in and access its interface. Click ‘Save and finish‘ to end the installation process.
Finally, you will get the go-ahead notification to start using Jenkins!
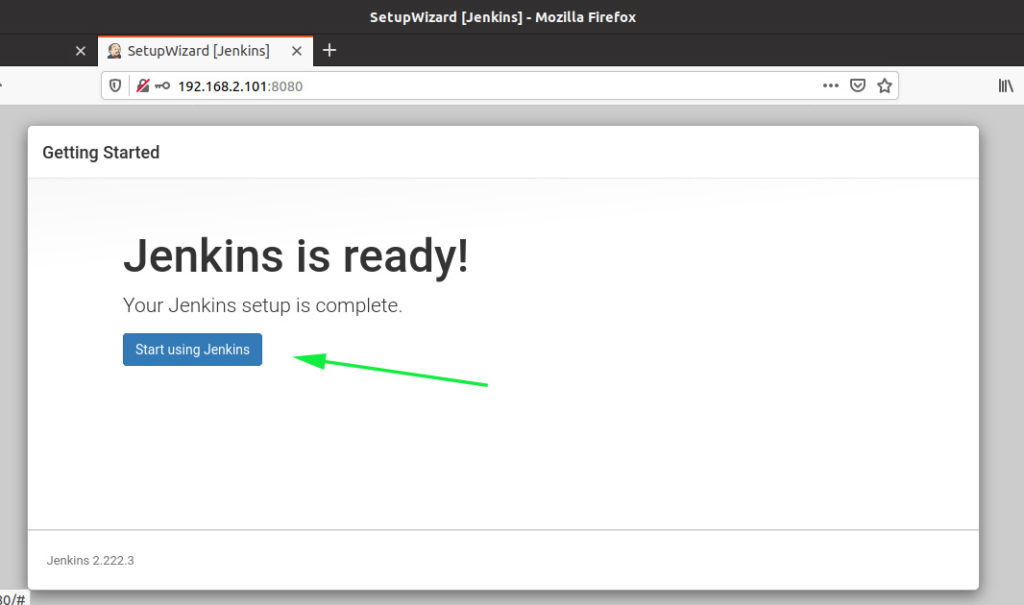
Click on the ‘Start using Jenkins‘ button to access the Jenkins dashboard.
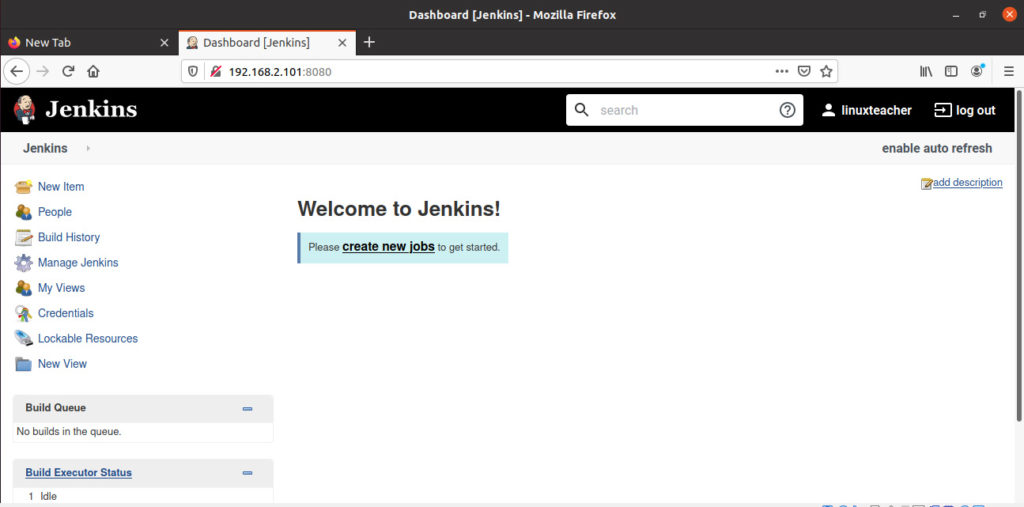
At this point, we have successfully installed Jenkins. You can now proceed and create new jobs and automate your process. In this article, you learned how to install Jenkins on Ubuntu 20.04. Give it a try and let us know your how it went.
-

 DevOps6 years ago
Saltstack Tutorial for beginners [2025]
-

 DevOps6 years ago
How to build a Docker cron job Container easily [2025]
-

 Linux7 years ago
mail Command in Linux/Unix with 10+ Examples [2025]
-

 DevOps6 years ago
Docker ADD vs COPY vs VOLUME – [2025]
-
 DevOps6 years ago
How to setup Pritunl VPN on AWS to Access Servers
-

 Linux6 years ago
Grep Command In Unix/Linux with 25+ Examples [2025]
-

 Linux7 years ago
Find command in Unix/Linux with 30+ Examples [2025]
-
Linux5 years ago
How To setup Django with Postgres, Nginx, and Gunicorn on Ubuntu 20.04


